Free pattern
Amigurumi Bunny Pattern (Free, Beginner Friendly)
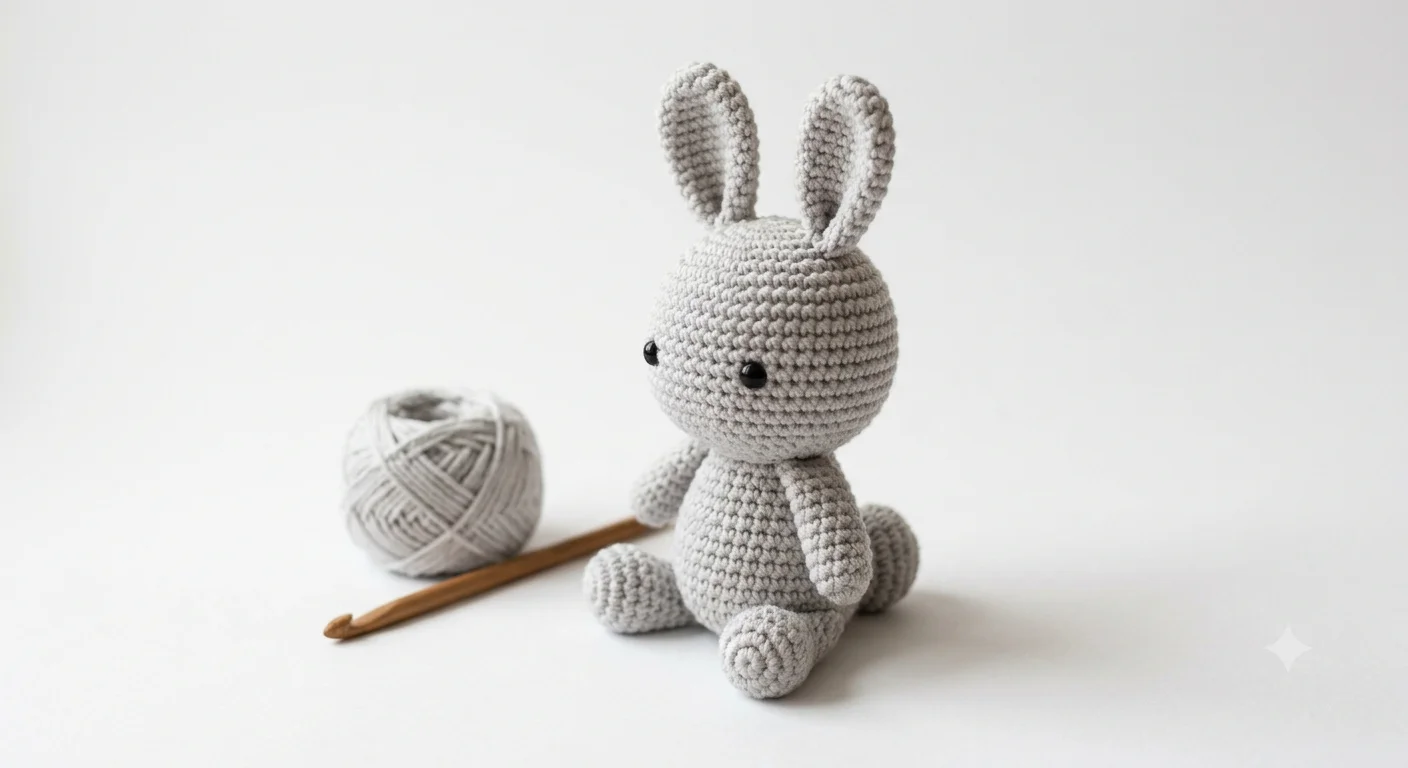
A small standing bunny in three pieces: the same ball body you already know, plus ears and a tail. This is the point where amigurumi starts feeling like making a thing rather than practicing a stitch.
- Skill level
- Beginner (comfortable with single crochet in the round, increases and decreases)
- Finished size
- About 4 inches tall
- Time
- 1.5 to 2 hours
What you need
- Worsted weight yarn in white or light gray (body), small amount of pink (inner ears, optional)
- 4mm (G-6) hook
- Polyester fiberfill stuffing
- 2 small safety eyes or black yarn for embroidering eyes
- Stitch marker
- Yarn needle
- Scissors
Abbreviations
- ch
- chain
- sc
- single crochet
- st(s)
- stitch(es)
- inc
- increase (2 sc in same st)
- dec
- decrease (2 sc worked together as 1)
Get the 4mm hook and yarn for this pattern


Instructions
Body (make 1)
- Round 1Ch 2, 6 sc in 2nd ch from hook. (6 sc)
- Round 2Inc in each st around. (12 sc)
- Round 3*Sc 1, inc 1* rep around. (18 sc)
- Round 4*Sc 2, inc 1* rep around. (24 sc)
- Rounds 5-9Sc in each st around. (24 sc) Begin stuffing around round 7.
- Round 10*Sc 2, dec 1* rep around. (18 sc)
- Round 11*Sc 1, dec 1* rep around. (12 sc)
- Round 12Dec in each st around. (6 sc)
Ears (make 2)
- Round 1Ch 2, 4 sc in 2nd ch from hook. (4 sc)
- Round 2Inc in each st around. (8 sc)
- Rounds 3-6Sc in each st around. (8 sc)
Tail (make 1)
- Round 1Ch 2, 5 sc in 2nd ch from hook. (5 sc)
- Round 2Sc in each st around. (5 sc)
Assembly
- Attach safety eyes (or embroider them) between rounds 6 and 7 of the body, spaced about 4 stitches apart, before the body is fully closed and stuffed if using safety eyes with a backing.
- Sew the ears to the top of the head, angled slightly outward, using the long tails left from each ear.
- Sew the tail to the back of the body, near the bottom.
- Weave in all remaining ends.
Finishing
Body: fasten off leaving a long tail, close the hole the same way as the basic ball pattern (weave through remaining front loops, pull tight), then set aside. Ears: fasten off leaving a long tail for sewing; flatten before sewing for a slightly floppy, folded look. Tail: fasten off leaving a short tail for sewing; stuff lightly before sewing on.
Notes
- If your ears are flopping in a direction you don't like, try sewing them at a slightly different angle, or fold them in half before attaching for a floppier look versus sewing them flat for upright ears.
- Safety eyes need to go in before the body is fully stuffed and closed, since you need access to the inside to attach the backing. Plan the order: eyes first, then stuff and close.
What to make next
Once a bunny feels comfortable, the same technique with different ear and face shaping gets you most other small animals. Try our amigurumi cat pattern next, or go back to all free patterns. If you'd rather follow a fully designed character pattern with a matched kit, see best amigurumi kits for beginners.
Get 5 more free beginner patterns
Five more patterns at this level, sent straight to your inbox — no kit or account needed.
No spam. Unsubscribe any time.
Already subscribed? Download the beginner crochet starter guide (PDF)